Are you ready to invest in your dream home without breaking the bank? At The Build Guy, we specialize in providing top-quality, cost-effective solutions for building new homes. Whether you’re looking for a cozy single-room unit or a more spacious two-room layout with additional features, we’ve got you covered.

What We Offer

1. 3 x 3 Single-Room Home (R16,400)

Our single-room option is perfect for those looking for a compact and functional living space. It includes all materials, such as:

  • Bricks and brickforce
  • Building and plaster sand
  • Cement
  • Door frame, door, and handle
  • Window frame and glass
  • Roof structure (wood)
  • Corrugated sheeting
  • Nails and screws

Price includes delivery.

2. Two-Room Home

Need a bit more space? Our two-room home option is ideal for small families or individuals needing additional room for comfort. It includes all the high-quality materials listed above, tailored to the two-room layout.

3. Two-Room Home with Garage

For those who need both living space and secure parking, our two-room home with a garage provides a practical and stylish solution. The garage adds functionality without compromising the aesthetic.

4. Two-Room Home with Garage and Toilet

Take your home to the next level with this premium option. This layout includes a two-room living space, a garage, and an integrated toilet—offering convenience and comfort in one package.

Why Choose Us?

  1. Affordable Pricing: Our packages are designed to meet your budget without sacrificing quality.
  2. All-Inclusive Materials: From bricks to nails, we provide everything you need to complete your build.
  3. Delivery Included: No hidden costs—we’ll deliver your materials to your site.
  4. Customizable Options: Need additional features or specific layouts? We’re here to make your vision a reality.
  5. Trusted Expertise: With years of experience in home renovations and construction, we’re a name you can trust.

Get Started Today

Investing in a new home has never been easier.

Contact Lucas at 072-770-1966 Call Now to secure your package and start building your future today.

Request a Quote

[wpforms id=”1598″]
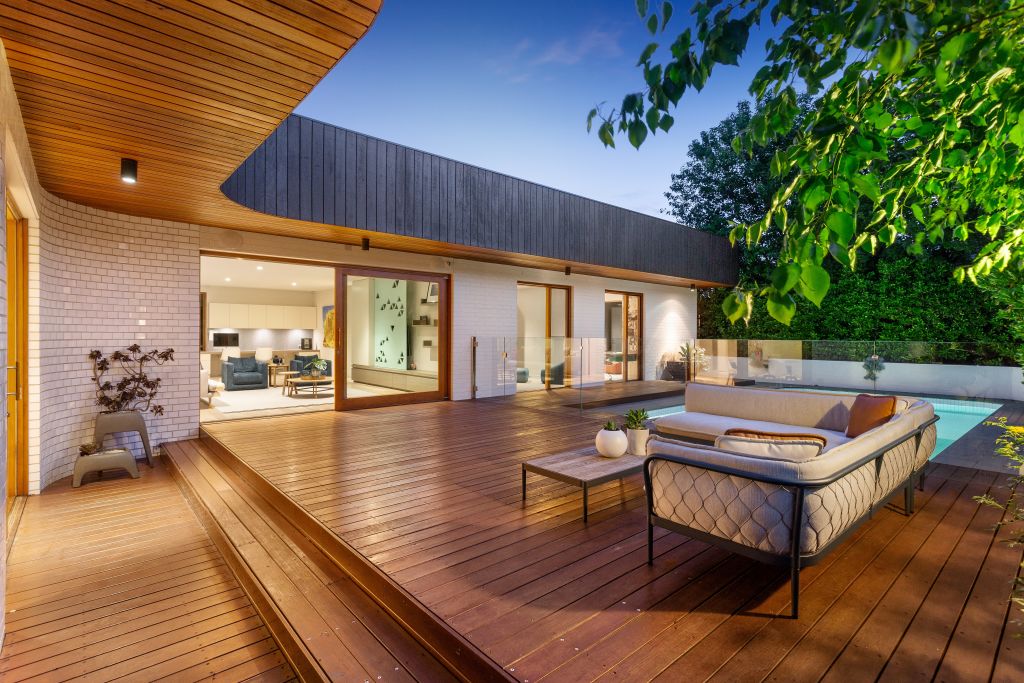
A wooden deck is a fantastic addition to any backyard, offering a functional and stylish outdoor space to relax, entertain, or enjoy the fresh air. Using treated pine decking makes the project both cost-effective and durable. Whether you’re a DIY enthusiast or a first-time builder, this How to Build a Wooden Deck A Step by Step Guide will walk you through the process of building your own wooden deck.


Why Choose Treated Pine for Your Deck?

Treated pine is one of the most popular materials for decking. It’s affordable, easy to work with, and resistant to rot, pests, and decay. With the right care, your deck can last for years while maintaining its natural beauty.


Getting Started: Tools and Materials You’ll Need

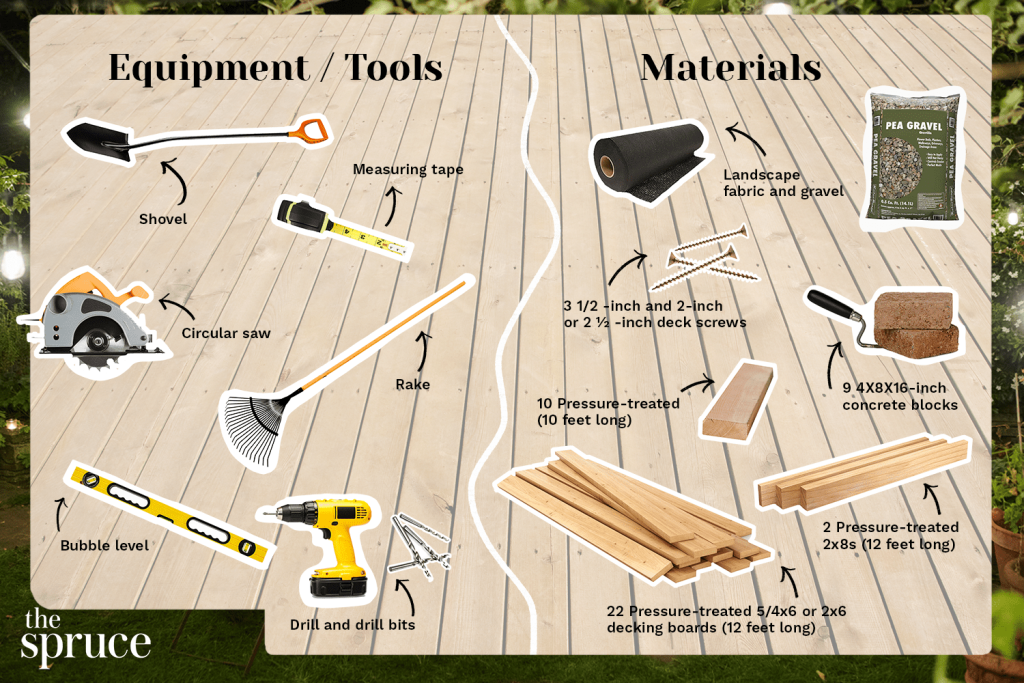
Before starting, gather the essential tools and materials:

Tools:

  • Tape measure
  • Circular saw
  • Power drill and screwdriver bits
  • Spirit level
  • Hammer
  • Spade or posthole digger
  • Carpenter’s square
  • String line
  • Clamps

Materials:

  • Treated pine decking boards
  • Treated pine joists and bearers
  • Deck screws
  • Galvanized or stainless-steel nails
  • Concrete mix (for footings)
  • Decking oil or stain
  • Weed mat (optional)

Step 1: Plan Your Deck

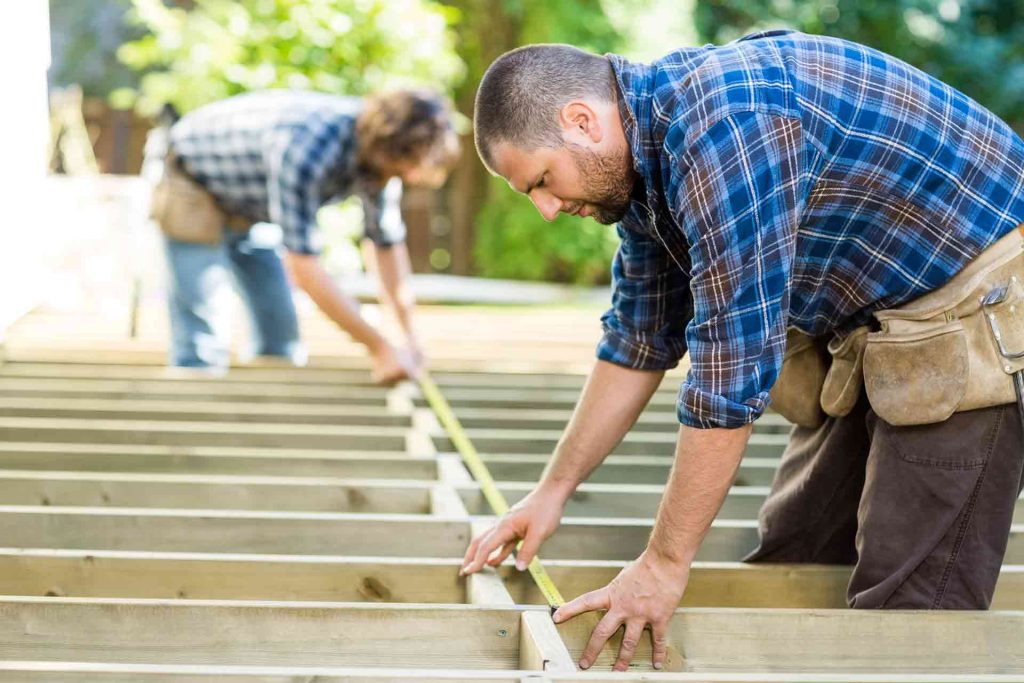
Good planning is the foundation of a successful project. Start by determining the size and layout of your deck. Measure the space in your backyard and decide on the deck’s design, including how it will connect to your house or existing structures.

Things to Consider:

  • Access Points: Ensure easy access to doors and pathways.
  • Sunlight: Think about how the sun moves through your yard and where you want shade or light.
  • Local Regulations: Check if you need permits or specific construction guidelines in your area.

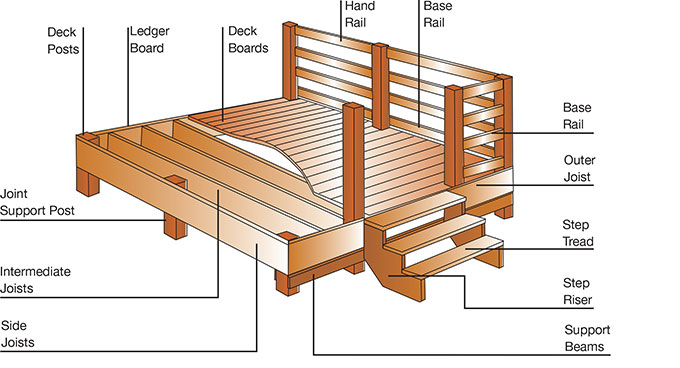
Sketch a simple design showing the support posts, bearers, and joists. This plan will guide your construction process.


Step 2: Prepare the Site

  • Clear the Area: Remove grass, rocks, and debris from the designated area.
  • Level the Ground: Use a rake or shovel to create a flat, stable surface.
  • Optional: Lay down a weed mat to prevent weeds from growing under your deck.

Step 3: Install the Footings

Strong, stable footings are crucial for your deck’s foundation.

  1. Mark Out Positions: Use string lines and stakes to mark the location of each footing.
  2. Dig the Postholes: Typically, postholes should be 450-600mm deep, depending on your local building requirements.
  3. Set Posts in Concrete: Place treated pine posts in the holes, ensuring they are level and aligned. Pour concrete around the posts and allow it to cure for the recommended time.

Step 4: Build the Frame

With your footings in place, it’s time to construct the deck frame.

  • Attach Bearers: Fix horizontal bearers to the posts using galvanized brackets or screws. Ensure the bearers are level.
  • Install Joists: Lay joists perpendicular to the bearers, spacing them at regular intervals (typically 400mm apart). Secure them with joist hangers.

A solid frame ensures your deck is stable and long-lasting, so take your time during this step.


Step 5: Lay the Treated Pine Decking Boards

Now comes the fun part—laying the decking boards!

  1. Measure and Cut: Cut your treated pine boards to size using a circular saw.
  2. Space the Boards: Use 3-5mm spacers between each board to allow for natural expansion and drainage.
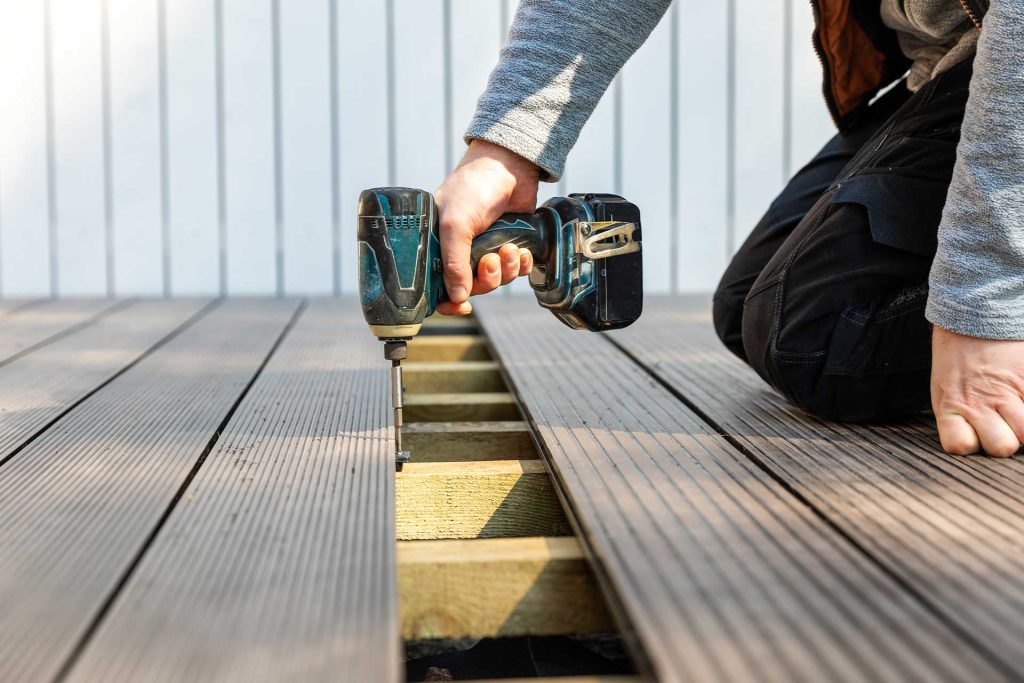
  3. Secure the Boards: Attach the boards to the joists with decking screws, ensuring they are flush with the surface.

Step 6: Finish Your Deck

  • Trim Excess: Use a circular saw to trim any overhanging decking boards for a neat edge.
  • Sand the Surface: Smooth out rough edges or splinters to make the deck safe and comfortable.
  • Apply Decking Oil or Stain: Protect the wood from weathering by applying a quality decking oil or stain. This will also enhance the natural beauty of the pine.

Maintenance Tips

To keep your deck looking great and performing well:

  • Reapply decking oil or stain every 6-12 months.
  • Regularly check for loose screws or damaged boards.
  • Clean the deck periodically to remove dirt and debris.

Enjoy Your New Deck

Building a treated pine deck can transform your backyard into a functional, beautiful space for relaxation and entertainment. By following this guide, you’ll create a sturdy, attractive deck that you can enjoy for years to come.

Got questions or tips about building decks? Share them in the comments below!

Introduction

The creation of seamless indoor-outdoor living areas has become a highly popular trend in recent years. More and more homeowners are trying to figure out how to combine the outdoor natural beauty with their inner spaces. A fashionable and efficient method to accomplish this is to transform your outdoor space with patio renovations/upgrades that include aluminum stacking doors and windows. These contemporary improvements boost your home’s visual appeal while also providing useful features like more natural light and higher energy efficiency.

Benefits of Patio Renovations

There are several ways that remodeling your patio might change your living area. It expands your home’s useful living space first and foremost. Your indoor spaces become bigger and more functional when you open them up to the outside, making them ideal for hosting guests or just lounging with the family. Renovating your patio can also greatly increase the value of your house, so it’s a wise investment. Last but not least, a renovated patio improves your house’s overall aesthetic appeal and creates a lovely, welcoming area you can use all year round.

Why Choose Aluminum Stacking Doors and Windows?

Aluminum Stacking Doors

Aluminum stacking doors and windows are a great option for patio upgrades because of their low maintenance needs and long lifespan. Aluminum resists rust and corrosion better than other materials, so your doors and windows will continue to look fantastic and perform flawlessly for many years to come. Aluminum frames’ sleek, modern style gives any house a dash of elegant modernism. Additionally, the great insulation and enhanced natural light allowed by these doors and windows maximize energy efficiency, which can help you use less artificial lighting and save money on energy costs.

Design Ideas for Your Renovated Patio

Design Ideas for Your Renovated Patio

The architectural options are virtually limitless when remodeling your patio with aluminum stacking doors and windows. Creating a smooth transition between interior and outdoor spaces is one prominent design concept. You may effortlessly open up a whole wall and combine your kitchen or living room with your patio by installing stacking doors. This open-concept layout is ideal for entertaining guests and taking in the outdoors’ splendor from the comfort of your house. Additionally, while designing your patio, think about including outdoor dining spaces and kitchens. This lets you make the most of your outdoor space and increases your possibilities for entertaining.

Installation Considerations

You have two options when it comes to installing aluminum stacking doors and windows: working with professionals or doing it yourself. A professional installation gives you longevity and peace of mind by guaranteeing that your windows and doors are installed securely and correctly. During installation, it’s important to take your budget, your home’s structural stability, and the available area into account. To make sure that any building codes or limits are being followed, it’s also crucial to check local permits and regulations.

Maintenance Tips

Aluminum windows and doors require less upkeep, which makes them a desirable choice for time-pressed homeowners. The frames can be kept in immaculate condition with routine washing using water and a light detergent. Routine checks are also a good idea to make sure the seals are still in place and the doors and windows are working properly. The longevity of your investment can be extended with seasonal maintenance, such as lubricating the tracks and looking for any indications of wear or damage.

Inspiring Patio Renovation Projects

In need of some motivation? Aluminum stacking doors and windows are a common component in many gorgeous patio makeovers. These projects frequently provide striking before-and-after comparisons to show off the influence that these contemporary additions can have on a house. Homeowners who have finished comparable improvements often testify to the enhanced usability and visual appeal of their areas. The options are unlimited, ranging from slick, minimalist layouts to comfortable, rustic hideaways.

Cost and Budgeting

Depending on the project’s size and complexity, installing aluminum stacking doors and windows can have varying costs. Obtaining comprehensive estimates from reliable vendors and builders is crucial in order to comprehend the entire extent of the financial commitment. Consider phasing the project over time and giving priority to important areas to make your makeover more cost-effective. Investigate financing choices as well in order to help stretch the cost and lower the cost of your ideal makeover.

Conclusion

Upgrading a patio with aluminum stacking doors and windows has several advantages, including more living space and property value as well as improved energy efficiency and visual appeal. Your house may be completely transformed with these contemporary, long-lasting extensions, giving you and your family a seamless indoor-outdoor living space that you can enjoy for years to come. Schedule your patio makeover job now to see the difference for yourself.

Call to Action

Ready to transform your patio? Contact us today for a consultation and quote on aluminum stacking doors and windows. Visit our website for more resources and inspiration, and don’t forget to share this post and leave your comments or questions below. Let’s create the outdoor space of your dreams!

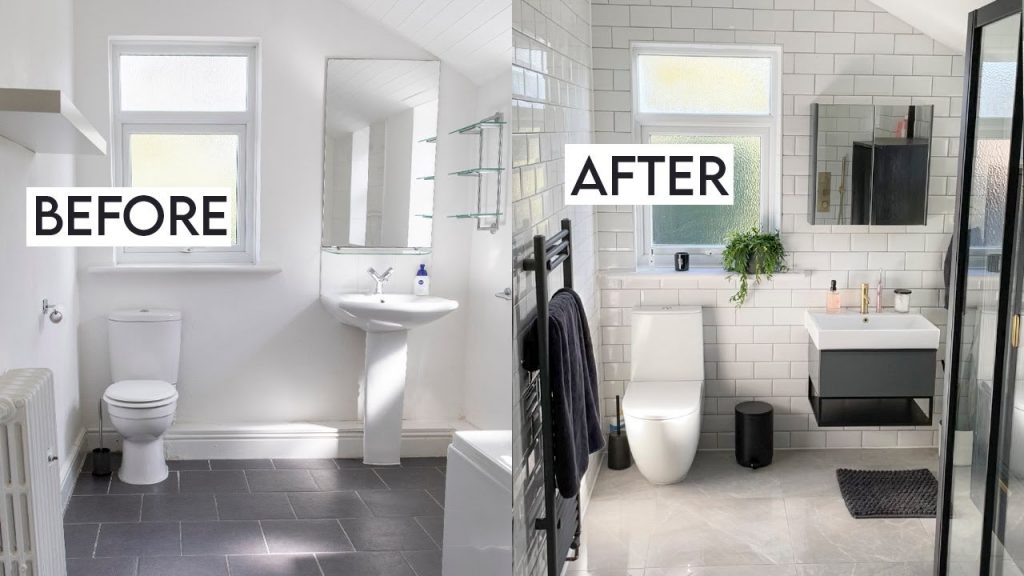
Budget-Friendly Bathroom Renovation Ideas: Transform Your Bathroom Without Breaking the Bank

Renovating your bathroom can be an exciting but daunting task, especially when you’re on a tight budget. However, with a bit of creativity and strategic planning, you can give your bathroom a fresh, modern look without spending a fortune. Here are some budget-friendly bathroom renovation ideas that will help you achieve a stylish and functional space without breaking the bank.

1. Plan and Prioritize

Before you dive into your bathroom renovation, it’s crucial to plan and prioritize your needs. Make a list of what you want to achieve and categorize them into must-haves and nice-to-haves. This will help you focus on the essential updates that will make the most impact without unnecessary spending.

2. Refresh with Paint

One of the most cost-effective ways to transform your bathroom is with a fresh coat of paint. Opt for light, neutral colors to create a sense of space and brightness. You can also use paint to give your cabinets and vanity a new look. Choose moisture-resistant paint to ensure durability in a humid environment.

3. Update Fixtures and Hardware

Swapping out old fixtures and hardware for new, modern ones can instantly update the look of your bathroom. Look for budget-friendly options for faucets, showerheads, towel racks, and cabinet handles. Even small changes like these can make a big difference.


4. DIY Where Possible

Tackling some of the renovation tasks yourself can save you a significant amount of money. Simple projects like painting, installing new fixtures, or even tiling can be done with a bit of research and effort. Just make sure you have the right tools and follow instructions carefully.

5. Repurpose and Upcycle

Get creative with repurposing and upcycling items you already have. For instance, an old dresser can be converted into a unique vanity. Adding a new countertop and sink can give it a fresh purpose. Scour thrift stores and flea markets for affordable pieces that can be transformed with a little DIY effort.

6. Opt for Affordable Alternatives

There are plenty of affordable alternatives to high-end materials that still offer great aesthetics and functionality. For example, consider luxury vinyl flooring instead of hardwood, or laminate countertops instead of natural stone. These materials can mimic the look of more expensive options without the hefty price tag.

7. Refinish Instead of Replace

If your bathtub or shower is looking worn out but is still in good condition, consider refinishing instead of replacing it. There are DIY kits available that allow you to refinish the surface, giving it a new look at a fraction of the cost of a new tub or shower.

8. Add a Splash of Tile

While tiling an entire bathroom can be expensive, you can add a splash of tile in strategic areas to create a focal point. Consider adding a tile backsplash behind the sink or creating a feature wall in the shower. This can add a touch of luxury without the high cost.

9. Use Mirrors to Create Space

Mirrors can make a small bathroom feel larger and brighter. Consider adding a large mirror above the sink or even a mirrored cabinet. You can find affordable options that add both style and functionality to your bathroom.

10. Accessorize Thoughtfully

Finally, don’t underestimate the power of accessories. New towels, a stylish shower curtain, and coordinated bathroom accessories can pull the whole look together. Choose items that complement your new design and add a touch of personality to the space.

Conclusion

Renovating your bathroom on a budget doesn’t mean you have to compromise on style or quality. By planning carefully, making strategic updates, and getting creative with DIY projects, you can achieve a beautiful and functional bathroom without breaking the bank. Remember, small changes can make a big impact, and with these budget-friendly bathroom renovation ideas, you’ll be well on your way to creating the bathroom of your dreams.


4o

When it comes to the final touches of your dream home, installing windows is a pivotal moment that not only adds functionality but also enhances the aesthetics of your living space. In this comprehensive guide, we will walk you through the step-by-step process of installing windows in a newly built house. Follow these expert tips to ensure a seamless installation that brings natural light and energy efficiency to your home.

1. Choose the Right Windows for Your Style and Needs

Before diving into the installation process, take the time to carefully choose the right windows for your home. Consider the architectural style, energy efficiency, and the desired level of natural light. Whether you opt for classic double-hung windows or modern casement windows, selecting the right style is crucial to achieving the look you want.

2. Gather the Necessary Tools and Materials

To begin the installation, make sure you have all the essential tools and materials on hand. This includes measuring tape, a level, a screwdriver, shims, insulation, caulk gun, safety glasses, and, of course, your chosen windows.

Gathering Tools and Materials

3. Measure and Mark the Window Openings

Accurate measurements are key to a successful window installation. Measure the window openings carefully, marking both the interior and exterior sides of the walls. Use a level to ensure your markings are straight and plumb.

4. Prepare the Window Opening

Before placing the windows, prepare the opening by cleaning it thoroughly and removing any debris. Apply a waterproof membrane to prevent moisture infiltration, safeguarding the longevity of your windows and protecting your home from the elements.

5. Install the Windows with Precision

Now comes the exciting part – installing the windows. Carefully position the window into the opening, making sure it fits snugly. Use shims to level the window, maintaining an even gap on all sides. Secure the window by screwing it into the frame.

6. Insulate and Seal for Efficiency

Enhance the energy efficiency of your home by applying insulation around the window frame. This step not only prevents drafts but also contributes to weatherproofing. Seal any gaps with a high-quality caulk to create a tight barrier against the elements.

7. Test the Window Operation

Before moving on, test the window’s operation to ensure it opens and closes smoothly. Address any issues immediately, adjusting shims or making modifications as needed to guarantee proper functionality.

8. Add Exterior Finishes for Protection and Style

Complete the installation by adding exterior finishes such as trim and siding. These not only protect your windows from the elements but also contribute to the overall aesthetic appeal of your home.

9. Create a Polished Interior Look

On the inside, install window casings and trim that complement your interior design theme. This step adds a polished look to your windows, completing the overall aesthetic.

10. Perform a Thorough Final Inspection

Conduct a detailed inspection to ensure your windows are securely installed, operate smoothly, and are well-sealed. Address any remaining concerns before considering the installation complete.

Conclusion: Enjoy Your Beautifully Installed Windows

Mastering the art of window installation in your newly built home is a rewarding process that significantly enhances your living space. By following these expert steps, you can ensure a successful installation that combines functionality, energy efficiency, and aesthetic appeal. Now, bask in the natural light, enjoy the views, and revel in the comfort of your beautifully installed windows. Your dream home is one step closer to perfection.

Why Are Binding Wire Used In Concrete Reinforcing?

Concrete reinforcing is a vital aspect of construction, ensuring the strength, durability, and longevity of concrete structures. Binding wire plays a crucial role in this process by securing reinforcing bars and providing stability to the structure. In this article, we will explore the significance of binding wire in concrete reinforcing and understand its functions, benefits, types, and proper usage techniques.

Purpose of Concrete Reinforcing

Concrete reinforcing is employed to enhance the structural integrity and performance of concrete elements. While concrete provides compressive strength, it is weak in tensile strength and prone to cracking and shrinkage. Reinforcing bars, commonly known as rebars, are used to counter these limitations and distribute tensile forces throughout the structure. Binding wire is utilized to securely hold these rebars in place, maintaining their proper spacing and positioning.

What is Binding Wire?

Binding wire is a thin and flexible wire made from various materials, such as steel or iron. It is typically available in rolls or coils and is specifically designed for the purpose of tying and securing reinforcing bars together. The binding wire acts as a connector, ensuring the rebars function as a unified structure and preventing individual bars from moving independently.

Functions of Binding Wire in Concrete Reinforcing

The primary function of binding wire is to secure the reinforcing bars within the concrete structure. By tightly wrapping the wire around the rebars, it effectively holds them in position, preventing any shifting or displacement during the concrete pouring and curing process. Binding wire also helps maintain the required spacing between the rebars, ensuring they are evenly distributed throughout the structure, which is crucial for optimal load distribution.

Benefits of Using Binding Wire in Concrete Reinforcing

The use of binding wire in concrete reinforcing offers several benefits, contributing to the overall performance and durability of the structure. Firstly, binding wire enhances the structural integrity and load-bearing capacity of the concrete. It creates a tightly interconnected network of reinforcing bars, distributing external loads more efficiently and reducing the risk of structural failure.

Another significant advantage is the improved resistance to cracking and weathering. Binding wire securely holds the rebars together, minimizing the formation and propagation of cracks in the concrete. This, in turn, increases the durability of the structure, making it more resistant to environmental factors such as temperature changes, moisture, and corrosion.

Types of Binding Wire

Binding wire is available in different materials, including steel and iron, with varying wire gauges. The choice of binding wire depends on the specific requirements of the project. Thicker wire gauges are generally used for heavy-duty applications, providing increased strength and stability. Thinner wire gauges are suitable for lighter structures or where flexibility is required.

Proper Techniques for Using Binding Wire

Using binding wire correctly is essential for ensuring its effectiveness in concrete reinforcing. The process involves tying the wire tightly around the overlapping points of the reinforcing bars, creating a secure connection. It is important to follow proper techniques, such as twisting the wire tightly with pliers, and ensuring proper alignment and spacing of the rebars. Safety precautions, such as wearing protective gloves and eye goggles, should also be taken during the binding wire installation process.

Conclusion

Binding wire plays a vital role in concrete reinforcing, providing essential support and stability to reinforcing bars. Its use in securing rebars and maintaining their proper spacing contributes to the structural integrity, durability, and performance of concrete structures. By understanding the functions, benefits, types, and proper usage techniques of binding wire, construction professionals can ensure the successful implementation of concrete reinforcing and the creation of strong and long-lasting structures.

When it comes to transforming your bathroom, one of the most impactful design elements is the choice of tiles. From sleek and modern to timeless and classic, the world of bathroom tiles offers endless possibilities. Stay ahead of the curve with the latest bathroom tile trends! Discover the Latest Bathroom Tile Trends!

  1. Subtle Sophistication: Embrace the beauty of understated elegance with neutral and earthy tones. Soft beiges, warm grays, and natural stone-inspired tiles create a calming and sophisticated atmosphere.
  2. Geometric Delights: Add a touch of contemporary flair with geometric tile patterns. Hexagons, chevron, and herringbone designs are making a statement in modern bathrooms, adding visual interest and a dynamic focal point.
  3. Bold and Beautiful: Make a splash with bold and vibrant tile choices. Deep blues, emerald greens, and rich jewel tones bring drama and personality to your bathroom, creating a captivating and luxurious ambiance.

Whether you prefer a minimalist aesthetic, crave a pop of color, or seek a timeless charm, there’s a tile trend to suit every style. Trust us to help you navigate the world of bathroom tile options and create a space that reflects your unique personality and design preferences. Discover the Latest Bathroom Tile Trends!

Contact us today to explore these trends and more!

Transform Your Bathroom into a Stunning Oasis | The Build Guy

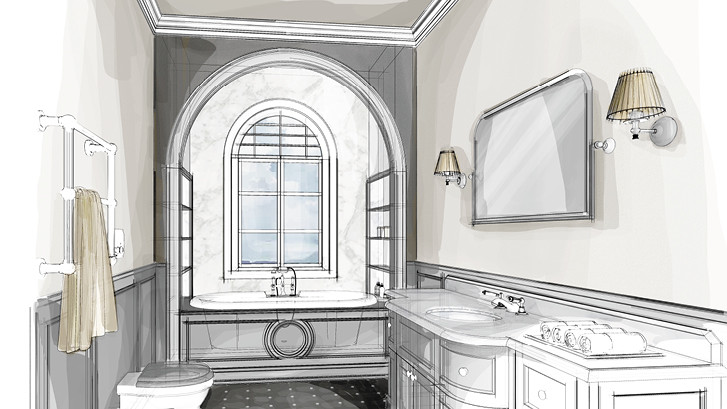
Are you dreaming of a bathroom that feels like a luxurious oasis? Look no further than The Build Guy, your trusted partner in transforming ordinary bathrooms into stunning retreats. With our expertise and commitment to excellence, we can turn your vision into a reality that exceeds your expectations. We are here to Transform Your Bathroom into a Stunning Oasis

The Importance of a Bathroom Oasis:

Your bathroom is more than just a functional space; it is a sanctuary where you begin and end your day. It is a place of relaxation and rejuvenation. A well-designed bathroom oasis can significantly enhance your daily routines and contribute to your overall well-being. From enjoying a soothing bath after a long day to starting your morning in a serene environment, a stunning bathroom can truly elevate your quality of life.

The Build Guy: Your Bathroom Renovation Experts:

At The Build Guy, we specialize in creating remarkable bathroom transformations. With years of experience and a passion for design, we have honed our expertise in crafting stunning bathroom spaces that combine functionality and aesthetics. Our team of skilled professionals is dedicated to delivering exceptional results and bringing your bathroom dreams to life.

Key Elements of a Bathroom Oasis:

Creating a stunning bathroom oasis involves considering key elements that contribute to its overall ambiance. From carefully selected fixtures and lighting to storage solutions and materials, every detail matters. The Build Guy understands the importance of these elements and ensures that each aspect of your bathroom renovation is carefully planned and executed.

Tailored Bathroom Designs:

We believe that your bathroom should reflect your unique style and preferences. Our approach is centered around understanding your vision and translating it into a design that suits your needs. Whether you desire a contemporary, minimalist space or a luxurious spa-like retreat, our talented designers will work closely with you to create a customized bathroom design that speaks to your individual taste.

Quality Craftsmanship and Materials:

At The Build Guy, we pride ourselves on our commitment to quality craftsmanship. We understand that durable and well-crafted installations are essential for a long-lasting and visually appealing bathroom. Our skilled craftsmen pay meticulous attention to detail, ensuring that every aspect of your renovation meets the highest standards of quality.

Transformative Bathroom Renovation Process:

Our bathroom renovation process is designed to make your experience smooth and hassle-free. It begins with an initial consultation, where we listen to your ideas, assess your space, and discuss the possibilities. Our experienced team will then create a detailed design plan that brings your vision to life. Throughout the project, we provide regular updates, ensuring transparency and keeping you informed every step of the way. Our goal is to complete your bathroom transformation efficiently and with minimal disruption to your daily life.

Testimonials and Success Stories:

Don’t just take our word for it; hear what our clients have to say. We are proud of the numerous satisfied customers who have entrusted us with their bathroom renovations. Their testimonials and success stories speak volumes about our dedication to customer satisfaction and the exceptional results we deliver.

The Build Guy Difference:

What sets us apart from other bathroom renovation companies? It’s our attention to detail, commitment to customer satisfaction, and reliable project management. We prioritize open communication, ensuring that your needs and preferences are at the forefront of every decision we make. Our team’s expertise and passion for excellence shine through in every project we undertake.

Call-to-Action:

Ready to transform your bathroom into a stunning oasis? Contact The Build Guy today to schedule a consultation. Let our skilled team of professionals guide you through the process and create a bathroom that exceeds your expectations. Your dream bathroom oasis is just a phone call away.

Conclusion:

With The Build Guy, you can trust that your bathroom renovation will be a seamless and rewarding experience. We have the expertise, craftsmanship, and commitment to excellence to bring your bathroom oasis to life. From concept to completion, we are dedicated to delivering stunning results that will